Wednesday, September 6, 2017

Read a Good Book: Reading People

I'm dusting off this old blog of mine to share a book I recently read, Reading People: How Seeing the World Through the Lens of Personality Changes Everything


I've been a fan of personality tests for awhile now. When I heard about this book written by Anne Bogle of Modern Mrs. Darcy and What Should I Read Next fame, I was really excited to read it. This book did such a good job of explaining the many different ways to figure out your personality type and talked about all the different angles that this task can be approached. It was a great deep dive into this area that I realized that I was only skimming on the surface until now. I learned so much, and now am able to apply it to my real life. It got me really thinking about other people that I interact with on a daily basis and how their personality could effect their thoughts and actions. I now understand why certain people do things the way they do a little more! I would definitely recommend this book to those who want an easy to understand approach to personality types, that is delivered in an informative, interesting, and fun way.

Of course I also had to take the reading personality test offered on Anne's blog...it combined two of my favorite things! I was labeled the Escapist, which sounded spot on to me. The best part was after I took the test, I got a list of recommended books geared to my reading personality. I had actually already read a few and liked them. The rest did look interesting, so I immediately put them on my hold list at the library. Will check in later once I read them to see how they worked out. If you want to take the reading personality test yourself click here. I would love to hear your results in the comments below.

Reading People is released on September 19. If you preorder, before that date from your preferred retailer, you get two bonuses.... a free download of the audio version and access to Anne's Reading Personality Class, which explores the types from her personality quiz in more depth. Go to ReadingPeopleBook.com


20622024_10155076767089825_5788559411035682335_n


I was chosen to be on the Launch Team for the book, and was given an advanced book from the publisher in return for my honest feedback. All opinions are my own.


Sunday, April 17, 2016

Make Room for What You Love - Third Week Challenge


And we're back with Week 3 of the Make Room for What You Love Challenge. This week Melissa of the Inspired Room challenged us to focus on the entryway of our homes and fight the paper clutter.


Here is what Melissa said:
Make Room for Arrivals and Departures
The arrival and departure areas of our home tend to collect quite a bit of clutter and often end up in disarray. We bring in a lot of papers, coats, schoolbags, purses, briefcases, sports equipment, homework, party invitations, and bills, and we track in mud and grime from outside. How do those clutter spots make you feel when they are out of control? This week, we’ll be setting up a sorting station so we can avoid paper pileups near the front door.
3 Steps to Setting Up a Paper-Sorting Station
1. Find a spot near your entry or office area where you’ll take all incoming mail. Put a shredder and recycling bin near this station so you’ll be able to immediately deal with papers you don’t want.
2. Plan to sort, shred, or recycle all the envelopes, newspapers, and junk mail, and put your bills in your previously designated spot every time you bring the mail in the house. Everything that is not a bill but has a due date or an upcoming deadline can go on a bulletin board with a clip or pin.
3. If a paper is important and you’ll need to access it later, file it in a designated file box or drawer. Give each housemate an inbox if they will receive mail or have papers that enter the house.
Get Organized Tip: If your child comes home with special papers you want to keep, get a clear box with a lid or a personal file box with folders to store the current year report cards, favorite assignments, art, and other significant papers.

The entry way in my house was already taken care of last year when I redid this space for the One Room Challenge.


But the paper clutter was something that I definitely still needed to tackle. I always seem to have a pile of papers in various rooms of the house that I can't throw away yet, but still need to be put some place. 


I have a small narrow closet that really isn't big enough to do much with, so I decided to make this my landing pad for all of the paper that still comes through the house. I put a simple white desk in the space, and added a box and a few bowls to catch odds and ends. I also put a pencil holder on the desk to make sure I always have a pen handy when I need to sign my kids papers. 


The biggest thing that is really going to help me get a handle on the papers is a new filling system. Now everything can be put where it needs to go, and I will be able to easily find something when needed. I am so excited about this and think it is going to be a great addition to my quest to rid my house of clutter.


If you want to join into the challenge, check in out here.

And the book is now available on Amazon!


Sunday, April 10, 2016

Make Room For What You Love - Second Week Challenge


It is time once again to share this week's challenge. I was selected by Melissa of the blog The Inspired Room to be part of a group to help promote her new book Make Room for What You Love. Be sure to check out what task I completed last week. And if you want, you can join in here.


Here is what Melissa challenged us to accomplish for week two....
This week, we’re going to focus on organizing your accessories station! This might be in your master bathroom, but the location doesn't matter as long as it is easily accessible as you are getting ready for the day.
3 Steps to Organize Your Accessories Station:
1. Find all of your scarves, jewelry, and accessories and bring them into one location near your clothing. Start with the scarves, and pick out any you like to wear regularly. Do you have hooks, a scarf hanger, basket, or a shelf for scarves? Hang hooks or set up a basket to organize the scarves you want to be able to wear.
2. Group jewelry by what you want to wear and really like. Then divide the items you use into groups of earrings, rings, bracelets, and necklaces.
3. Set up a simple system and a home for each. The important thing is to have jewelry accessible and ready to use right away. To simplify for now so you can move forward, necklaces can be hung on the wall or on a bulletin board with pushpins or hooks. Hang earrings from a ribbon on a wall or on a corkboard. Bracelets can go on hooks, on a plate, on a tray, or in a basket.
Get Organized Tip: Do you have hooks on the back of your doors and on the wall? If not, make a note to add them so you can easily hang a towel, robe, purse, or even your outfit for the day to keep everything off the floor.

I don't wear a large amount of jewelry, but for some reason I apparently have alot of it. Something I didn't fully appreciate until I emptied out my jewelry box and got to work sorting. Once I was done, it was amazing to me how much I removed! I was left with just the pieces I truly loved...and I could actually see them easily now. This will make getting dressed in the morning so much easier. 


One side I grouped my statement necklaces and what my grandmother would call costume jewelry, On the other side I have my more delicate chain necklaces and of course a few pearl necklaces...I am a southern girl at heart. In the drawers are my earrings, that are now all paired together, and bracelets. On the top of the box, you can see the bag I use to store my accessories when I am traveling. Placing them in a pretty bag helps keep things from getting tangled or from getting lost.
I honestly do not  love the wood on this jewelry box, but I resisted the urge to spend hours picking out just the right color and then painting it, adding pretty paper to the back, etc. That will be for another day. For now, I am glad I didn't get side tracked, and now have my accessories organized. It was definitely a success. I can now check this challenge off the list.


Friday, April 1, 2016

Make Room for What You Love - First Week Challenge


I am so excited to announce that I am joining with Melissa of the blog The Inspired Room to celebrate her new book Make Room for What You Love. I read her first book Love the Home You Have, and was so inspired by the simple truths and lovely advice. Plus the graphics and quotes through out the book are so gorgeous. I can't wait to read Melissa's latest book. I just know it will be just as good.

A few days ago, I got this in the mail. 


Along with this lovely cup. Perfect for sipping tea while reading the new book!


As part of the book launch, a select group of people were selected to take part in weekly challenges and receive a few other goodies. It was such a thrill for me to be asked to join this group. Melissa is also opening this challenge up to all of you. If you would like to join me and follow along each week click here.

Here is this week's challenge:


Retreating to your master bedroom should feel like a reward at the end of a long day. It’s a sacred space. In a serene haven, clutter is an unwelcome housemate. In order to launch into your day with energy and anticipation, you need to have the areas where you keep clothes organized and functional.
This week we’re going to focus on cleaning out your dresser.
3 Steps to Decluttering Your Dresser
1. Empty your clothing and belongings from dresser drawers.
Take advantage of this moment to wipe them out and even add new drawer liners if you want to.
2. Take stock of how much drawer space you have. What do you need your drawer space for? Assign each drawer a purpose, with space for each category of belongings (such as socks, undies, slips, tights, PJ’s.).
3. Now it’s time to put back what you really use. What is in good condition, fits, and you actually like to wear? Put those items back in the drawer in the designated space. Match up socks. If you have lone socks, start a lonely sock basket, and if the mate turns up, you’ll be able to return them to the dresser. If the drawers become too crowded, pare down or relocate items if you have another option.
Get Organized Tip: You can make easy DIY drawer dividers from old shoe and gift boxes.

This one was actually really easy for me since I had actually already gone through my clothes a few months ago. I did want to share my top drawer organization though. I found shoe boxes (love the hot pink...the pop of color makes me so happy when I open the drawer) and use them to divide up each category of clothing. It makes it so much easier to find things, and I love how neat it keeps my clothes organized in the drawer.


Now is your chance to pre-order your copy. Today only Make Room for What You Love will be ***50% off*** for ONE DAY ONLY at Barnes & Noble online \(no joke, April 1)! That's a CRAZY deal!


And let me know in the comments how your challenge this week goes. Any great tips you have to keep your clothes organized?

Sunday, November 15, 2015

One Room Challenge: Fall 2015 ~ Week 6


The big day is finally here. Reveal Day! I always enjoy participating in the ORC, and now have completed five rooms because of this challenge. This time I decorated my master bedroom. I was so happy with how it turn out, and it is so nice to have a completed room. Get ready for alot of pictures...


The roman shades above the window seat look so much better after the addition of a ribbon trim. Unfortunately, the cushion for the seat didn't get completed in time, but it will be here soon. Can't wait to curl up with a book and a cup of tea and gaze out the window while sitting in this cozy spot.


I am so happy with how the art above our dresser turned out.


I purchased these book pages from ebay, and I love the flower drawings.  It needed a little something extra, so I took gold paper clips and slipped them onto all four corners of the pages.


After using double sided tape to hold the fabric backing and the pages in place, I used an inexpensive poster frame to complete the look.


And the best part of the room is the rug. I purchased this rug following my tips to buy a rug on ebay, and was so happy with the way it looked when it arrived. It adds just the right amount of color.


I have wanted a pillow like this for my bed for awhile now, and I finally made one using a curtain I bought years ago. I never ended up using it for my original purchase, but the pattern of the fabric looks perfect in this bedroom.


Be sure to check out the other guest participants in the One Room Challenge.


Sunday, November 8, 2015

One Room Challenge: Fall 2015 ~ Week 5


And we are in the home stretch, Week 5 of the One Room Challenge is here. 
 
I have a few projects I need to finish up, but for the most part, I am almost done with this room. Normally, I am in panic mode right about this time. In a way, though this has been one of the calmest rooms, I have done. I think the secret was I started out with a good plan and I haven't really wavered from it.
 
I can't wait for the big reveal next week, but in the meantime, here are a few sneak peeks.


Be sure to stop back next week to see the finished room.
 
Check out the other One Room Challenge Guest Participants over at Calling It Home.


Sunday, November 1, 2015

One Room Challenge: Fall 2015 ~ Week 4


Week Four is here! I really feel like I need to put a Under Construction sign on my bedroom door. I am gotten bits and pieces done this week in the bedroom, but things are definitely a long way from being complete.

I put ribbon trim on my roman shades. I didn't want to take the shades down off the windows, (because...well...I am lazy) and the glue I tried to use would not hold long enough to adhere in the vertical position. So I did what any child of the 80's would do, especially one who has long time experience adhering ribbon to DIY decorated sweatshirts along with adding some designs drawn with puffy paint and a little blink with the bedazzler. I broke out the glue gun, and it worked like a charm.

I am still trying to decide how I want to put up the botanical pictures I bought.

Should I go the traditional grid pattern ...

My Most Asked-About Accessories: gallery wall grid of botanical prints, inexpensive frames with gold spray paint, custom mats, piano, blue and white lamps, entryway, foyer, stripes:


Maybe hang from a picture rail...

You will love these easy and fun picture hanging tricks from our resident weekend decorator!!:


Or do something different. Now I am liking this idea also...

 photo IMG_0621.jpg


Decisions Decision...Any opinions out there?

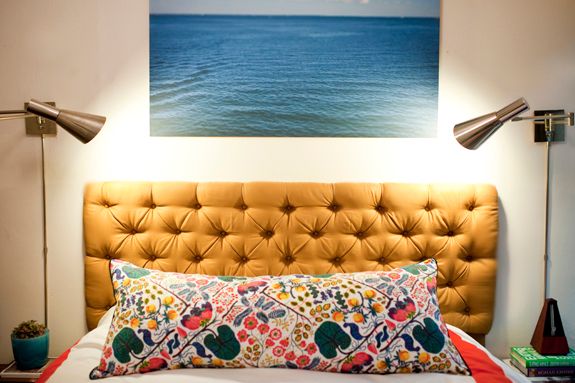
There is still some pillows to make and a few extra accessories to add in. I have been lusting after a pillow like this on my bed for years, and I am finally going to make one.


Also, I did decide to get the cover for my window seat made by a professional. Time was the big deciding factor. Can't wait for it to arrive next week!

Good thing I still have two more weeks because there is lots to do...

To check out the other One Room Challenge Guest Participants hop on over the Calling It Home